



Concrete refinishing: how to restore a worn slab without replacing it
A patio that was once smooth and clean now feels rough under bare feet, and the driveway has dark patches that never quite dry after rain. Most homeowners reach this point long before the slab beneath has actually failed, and that gap between a tired surface and a sound base is exactly where concrete refinishing earns its place. The goal is not to hide damage with a cosmetic coat. It is to remove the weakened top layer, expose sound concrete, and bond a new surface to the base so the slab looks and performs like new.
This guide explains how a careful homeowner or contractor should approach concrete refinishing, from the first assessment to long-term protection. It covers how to judge whether a slab is a good candidate, what preparation actually involves, which materials suit different situations, and where the project is most likely to fail. The aim is to make decisions based on what the slab is telling you, not on what a product label promises.
What concrete refinishing actually means
Concrete refinishing is the process of removing or treating the deteriorated top layer of a concrete slab and installing a new surface that bonds to the sound concrete beneath. It is distinct from full replacement, which removes the entire slab, and from simple coatings, which sit on top of an unprepared surface. The new layer is typically thin, often between one-eighth and three-eighths of an inch, and is engineered to adhere chemically and mechanically to the substrate below.
The term covers a family of treatments, including:
- Resurfacing with a polymer-modified cementitious overlay
- Grinding and polishing to expose aggregate and harden the surface
- Staining and sealing to refresh color and protect the slab
- Decorative finishes such as stamped overlays, broom finishes, or trowel textures
Each method shares the same foundation. The slab must be clean, sound, and properly profiled before any new material goes down. Skipping that preparation is the single most common reason a refinished surface fails early.
How to tell whether a slab is a good candidate
Not every worn slab should be refinished. The most important decision happens before any product is mixed, and it is based on the condition of the concrete beneath the surface damage. A useful first pass is to look at the symptoms and ask whether they are cosmetic or structural.
Surface signs that usually support refinishing
- Light scaling, where the surface has flaked to a depth of a few millimeters
- Shallow pitting from freeze-thaw cycles or deicing salts
- Worn or polished-smooth texture in high-traffic areas
- Hairline cracks that are stable and not moving
- Discoloration, staining, or uneven fading from sun exposure
Signs that suggest the slab is not a good candidate
- Deep structural cracks that run through the slab
- Rocking or movement when weight is applied
- Hollow sounds when the slab is tapped, which suggest delamination
- Active moisture coming up through the slab or persistent wet spots
- Severe spalling that exposes rebar or large aggregate
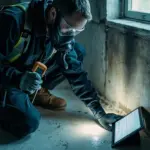
A simple test can help. Sweep the slab clean, then tap the surface in several spots with a broom handle or the handle of a screwdriver. A solid ringing sound usually means good contact with the base. A hollow or drum-like sound suggests that the surface layer has separated from the substrate and a bonded repair is unlikely to hold. The same check can identify the size of any unstable area, so repairs are cut back to sound concrete rather than blended into a failing edge.
The three stages of preparation
Once a slab is judged suitable, preparation determines almost everything about the outcome. Industry guidance on concrete resurfacing treats this stage as a sequence of three distinct phases: cleaning, targeted repairs, and mechanical profiling. Rushing any one of them tends to show up later as a bond failure or a patchy finish.
Cleaning
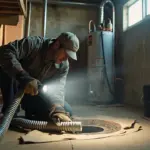
Contaminants settle into the pores of the slab over years, and most of them will interfere with adhesion if they are not lifted or dissolved. Oil drips on a driveway, leaf stains on a patio, and cleaning residues on a garage floor are all common offenders. A degreaser or a specialty concrete cleaner is usually enough for routine contamination, while paint, sealers, or curing compounds may require chemical stripping or mechanical removal. Softened or delaminated cement must be cut back to sound material so the new layer bonds only to concrete that can carry load.
Homeowners often see darker wet spots or uneven drying during the cleaning stage, and those patches are useful information. They usually mark areas where the surface has absorbed more moisture and may need extra attention during profiling or priming.
Targeted repairs
Cracks and shallow voids need to be filled with a repair material that cures to a hardness compatible with the overlay. A soft patch under a hard overlay will telegraph through as a dip, and a hard patch under a softer overlay will grind down unevenly under traffic. The repair must also cure fully before the next stage. Most polymer-modified patching compounds need at least 24 hours, and some need longer in cool or damp conditions.
For hairline cracks, a thin slurry of the resurfacing material itself can be worked into the crack as part of the placement step. For wider cracks, a separate repair product and a curing period are usually required.
Mechanical profiling
This is the step that gives the new surface something to grip. Grinding, scarifying, or shot blasting exposes stronger concrete and creates a uniform texture the overlay can anchor to. The goal is consistent roughness across the entire slab, not a deep scratch pattern. Dust has to be removed completely, because even a thin film can interfere with adhesion.
For homeowners, this stage often feels like sanding before repainting a piece of furniture. The slab should look clean, slightly rough, and evenly absorbent. If a drop of water beads on the surface, the profile is not yet adequate.
Choosing the right refinishing material
For additional context, Materials for concrete refinishing fall into a few broad families, and the best choice depends on the slab’s exposure, the desired appearance, and the level of traffic the surface will see. A side-by-side comparison helps clarify the trade-offs.
| Material type | Typical thickness | Best suited to | Key strengths | Main limitations |
|---|---|---|---|---|
| Polymer-modified cementitious overlay | 1/8 to 3/8 inch | Driveways, patios, pool decks, garage floors | Strong bond, can be textured, accepts stains and color | Needs careful curing, sensitive to mix water |
| Self-leveling underlayment | 1/4 inch and up | Interior floors before coverings | Smooth, flat surface, fast application | Not a finished wear surface without a topcoat |
| Microtopping or skim coat | Less than 1/8 inch | Decorative interior floors, countertops | Thin profile, can be stained or dyed | Limited repair depth, not for heavy traffic |
| Epoxy or urethane coating | Films to 1/8 inch | Garages, basements, commercial floors | Chemical resistance, decorative flakes or finishes | Sensitive to moisture vapor, can be slick when wet |
| Polished concrete (grind and polish) | None added, surface ground | Interior slabs, retail and residential floors | Hard, durable, low maintenance | Reveals existing flaws, requires skilled grinding |
For most exterior residential work, a polymer-modified cementitious overlay is the most forgiving option. It bonds well to a properly prepared slab, accepts a broom or trowel finish for slip resistance, and can be stained or colored before sealing.
Mixing and placement in real conditions
Even a well-prepared slab will fail if the material is mixed or placed carelessly. The most common variables are water ratio, batch size, and timing. The product data sheet is the source of truth here, and the amounts should be measured rather than estimated.
Water ratio
Too little water makes the mix stiff and hard to place, which leads to trowel marks and cold joints. Too much water weakens the cured surface and increases shrinkage, which shows up as hairline cracks. The goal is the lowest water content that still allows the mix to flow and self-level for the chosen finish.
Batch size
Polymer-modified overlays hydrate quickly, and the working time is often shorter than the time it takes to mix a second batch. Batching should match the pace the crew can place and finish. Hot, breezy conditions shorten working time further, so smaller batches and tighter sequencing help keep the mix workable.
Substrate moisture
Concrete absorbs and releases moisture based on humidity, temperature, and sun exposure. A slab that dries too quickly pulls moisture out of the overlay, weakening the bond. A slab that stays wet interferes with curing. Most overlays require a surface that is damp but not saturated. Lightly misting the slab just before placement, without leaving standing water, is usually enough.
Edges and transitions dry faster than the main field, so they need to be placed and finished in a way that avoids visible seams. Overworking the surface brings excess water and fines to the top and weakens the finish, so the trowel or broom should do its work in as few passes as possible.
Curing and the first days of service
Curing is the period during which the overlay hydrates and gains strength. It needs stable moisture and temperature, which is why most product guides warn against placing overlays in direct sun, high wind, or freezing conditions. The first 24 hours matter most, and the first 72 hours are a common safe window before foot traffic.
For exterior slabs, light misting or a wet burlap cover can keep the surface from drying out. For interior slabs, controlling airflow from fans or air conditioning helps the overlay cure evenly. Rolling loads, vehicles, and dragging heavy items should wait until the overlay has reached most of its design strength, which the product data sheet will specify. Homeowners who keep resurfaced areas off-limits for the first few days avoid most of the early failures contractors get called back to fix.
Finishes that improve both appearance and safety
The finish is chosen for the use of the slab as much as for its appearance. A smooth trowel finish on an outdoor patio is comfortable to walk on but can be slick when wet. A broom finish gives texture and slip resistance at the cost of a more rustic look. Stamped or stenciled patterns can mimic stone or tile while keeping a broom texture for safety.
| Finish type | Slip resistance | Best location | Maintenance notes |
|---|---|---|---|
| Light broom | Good | Driveways, sidewalks, pool decks | Easy to clean, hides minor wear |
| Medium broom or swirl | Very good | Patios, porches | Visible texture collects dirt, needs occasional scrubbing |
| Smooth trowel | Fair when dry, poor when wet | Interior floors, covered porches | Shows wear patterns, easy to recoat |
| Stamped or patterned | Good to very good | Decorative patios, entryways | Sealer wears on high spots, plan for resealing |
| Polished (grind and seal) | Fair | Interior floors, basements | Requires burnishing or recoat to maintain sheen |
For any exterior slab that will see rain, irrigation, or pool water, a textured finish is the safer default.
Stains, dyes, and color choices
Concrete refinishing is a good moment to add color, because the new surface accepts stains and dyes more uniformly than older, weathered concrete. There are two broad families to consider.
- Penetrating stains react with the cement paste and produce variegated, mineral-like tones. They are durable and do not peel, but the final color is influenced by the slab’s composition and is hard to predict exactly.
- Surface dyes and integral pigments offer more uniform color, including brighter shades, but usually need a sealer or topcoat to resist wear and UV exposure.
For exterior work, color stability under sunlight and resistance to fading matter as much as the initial appearance. Test patches in an inconspicuous corner are a small step that prevents a large disappointment.
Sealers and long-term protection
A sealer is the final layer of a refinishing project and the one that takes the most daily abuse. It is what stands between the new surface and the moisture, salts, oils, and UV exposure that caused the original deterioration. Sealer choice is driven by exposure and use.
| Sealer type | Typical lifespan | Best for | Considerations |
|---|---|---|---|
| Penetrating silane or siloxane | 5 to 10 years | Exterior driveways, patios, pool decks | Maintains slip resistance, invisible finish |
| Acrylic film-forming | 1 to 3 years | Decorative concrete, stamped patios | Enhances color, wears in traffic paths, easy to recoat |
| Polyurethane or polyaspartic | 5 to 10 years | Garages, commercial floors | High abrasion and chemical resistance, more involved application |
| Epoxy topcoat | 5 to 10 years | Interior floors, basements | Hard, chemical resistant, can yellow in sunlight |
Penetrating water-repellent treatments are often the best fit for residential exterior slabs because they protect against the moisture cycles and freeze-thaw damage that drive most deterioration, without changing the look or the slip resistance of the surface. The broader effect of these treatments is a more even drying pattern and fewer dark, patchy areas after rain. Independent guidance on surface preparation for bonded overlays underlines the same point: a uniform, well-profiled slab is the foundation of any long-lived refinishing project. Useful background on the chemistry of portland cement and the way pozzolans contribute to long-term strength is available in the Portland cement overview, which explains why moisture management matters from the first mix to the final sealer.
Common failure modes and how to avoid them
Most early failures in concrete refinishing have the same handful of root causes. Knowing them in advance is the easiest way to avoid them.
- Bond failure from contamination: oil, sealer, or curing compound left on the slab keeps the overlay from bonding. Solvent cleaning and profiling usually expose this, and a final water-drop test will reveal it before any material is mixed.
- Delamination from moisture vapor: moisture rising through the slab pushes the overlay off from below. Slabs with a known vapor issue, or those placed directly on damp soil without a vapor barrier, need a moisture-tolerant system or a vapor-blocking primer.
- Shrinkage cracking from over-watering: too much water in the mix or wet substrate conditions during placement cause a network of fine cracks as the overlay cures. Following the mix ratio and dampening without saturating the slab are the simplest preventions.
- Surface wear from missed curing: walking or driving on the overlay before it has cured leaves marks that no sealer can hide. Blocking off the area for the first few days is far cheaper than a partial redo.
- Sealer failure from poor timing: sealing before the overlay has fully cured traps moisture and causes whitening or hazing. Most products specify a wait time, often several days to a few weeks, before the sealer goes down.
Refinishing versus replacement: a practical decision
Replacement is the right answer when the slab is structurally compromised, when the elevation needs to change, or when the cost of repeated repairs is approaching the cost of starting over. Refinishing is the right answer when the surface is tired but the base is sound, when budget or time is limited, and when the existing slab is worth preserving. A simple comparison helps frame the decision.
| Factor | Refinishing | Full replacement |
|---|---|---|
| Typical cost per square foot (residential) | Lower, but varies with prep and finish | Higher, driven by demo and new pour |
| Project duration | Days, including curing | Weeks, including cure time for the new slab |
| Disruption to landscaping and adjacent surfaces | Minimal | Significant |
| Expected lifespan with maintenance | Often 10 to 15 years or more | 30 years or more for a new slab |
| Suitability for structural problems | Limited | Complete |
| Design flexibility | High, especially with overlays and stains | High, but limited by forming and pouring |
Refinishing is often the more sustainable choice because it keeps the existing concrete in service, reduces demolition waste, and avoids the embodied energy of a new pour. It also tends to be the faster and more affordable path when the underlying slab is in good shape.
A realistic project timeline for a residential slab
For a typical two-car driveway or a mid-size patio, a careful project tends to follow a similar rhythm. The exact days depend on weather, product choice, and crew size, but the sequence is consistent.
- Day 1, assessment and cleaning: tap-test the slab, mark unstable areas, and apply the appropriate cleaner. Rinse and let the slab dry.
- Day 2, repairs and profiling: cut out unstable material, fill cracks and pits, and grind or shot blast the surface. Vacuum dust and check the profile with a water drop.
- Day 3, placement: mix in small batches, dampen the slab, and place the overlay in sections. Apply the finish and keep the area off-limits.
- Days 4 to 7, curing: mist or cover as the product requires, control foot traffic, and watch the weather for rain or temperature swings.
- Day 7 to 14, staining and sealing: apply color if desired once the surface is stable, then seal with the chosen product. Keep vehicles and heavy furniture off for another day or two.
Pool decks, garage floors, and commercial floors often add steps for moisture barriers, densifiers, or higher-performance topcoats, but the basic shape of the project is the same: assess, prepare, place, cure, and protect.
Frequently asked questions
How long does concrete refinishing typically last?
A well-prepared and properly sealed refinishing project on a sound slab often lasts 10 to 15 years before the sealer needs refreshing and minor repairs are needed. Interior polished or coated floors can last longer, while heavily trafficked exterior surfaces may need attention sooner.
Can concrete refinishing be done in cold or hot weather?
It can, but conditions matter. Most polymer-modified overlays need temperatures above roughly 50 degrees Fahrenheit during placement and the first 24 hours of curing, and they do not like direct sun or strong wind during placement. Hot, dry conditions shorten working time, while cold conditions slow curing. Planning the project for mild, overcast weather is the easiest way to stay within product limits.
Is concrete refinishing a DIY project?
Small interior floors and simple broom-finished patios are within reach of a careful homeowner with the right tools and realistic expectations. Anything that involves structural repair, thick overlays, moisture-mitigation systems, or polished finishes is usually better left to a crew with grinding equipment and product-specific experience. The preparation stage, in particular, is where DIY results most often fall short.
How do I know if the slab has a moisture problem?
Tape a square of plastic sheeting to the slab for 24 hours and look for condensation underneath. Persistent dark spots that never quite dry, a musty smell, or a history of water vapor pushing up through previous coatings are also signs of moisture issues. A moisture-tolerant primer or a vapor barrier system may be needed before any overlay goes down.
Will refinishing cover cracks?
It will hide stable, hairline cracks, and a well-bonded overlay can keep them from reappearing for years. Active cracks, especially those that are widening or moving, will usually telegraph back through. Those need to be evaluated as structural issues and addressed before any cosmetic work is done.
Can I change the color of my concrete when refinishing?
Yes. Penetrating stains, integral color, and topical dyes can all be used during a refinishing project. The new surface accepts color more evenly than older weathered concrete, which is one of the main reasons homeowners choose to combine color with refinishing rather than stain alone.
What is the difference between refinishing and resurfacing?
In common use, the terms overlap. Some contractors use refinishing for any treatment that refreshes the surface, including staining, sealing, and polishing, and use resurfacing specifically for the application of a new bonded layer. Others use the terms interchangeably. The important thing is to agree on the exact scope of work, not the label.
How soon can I drive on a refinished driveway?
Foot traffic is usually safe after 24 to 72 hours, depending on the product and conditions. Vehicles should wait longer, often a week or more, until the overlay has reached most of its design strength. The product data sheet will give a specific window, and following it is the easiest way to avoid tire marks or surface damage.
Does refinishing make a slab slippery?
A smooth, sealed surface can be slippery when wet, especially around pools or on sloped driveways. A broom finish, a textured overlay, or a non-slip additive in the sealer all improve traction. The choice of finish should reflect how the slab will be used, not just how it looks in a dry sample.
How do I maintain a refinished surface?
Routine sweeping and occasional washing with a neutral cleaner keep most surfaces in good shape. Avoid harsh acids and high-pressure washing close to the surface. Reseal on the schedule the product recommends, often every one to three years for film-forming sealers and longer for penetrating treatments. Address small cracks and chips early, before they grow into larger repairs.
A slab that has been carefully assessed, properly prepared, and finished with a sealer suited to its exposure will perform for years with modest maintenance. The work is front-loaded, and most of the cost is in the decisions made before the first bag is mixed. Treat the surface as a system rather than a product, and concrete refinishing becomes a way to extend the life of a slab that still has plenty of service left in it.

Leave a Reply